This is the shortest useful path through ReactLive. Each step links to the page that explains it properly; nothing here needs more than the defaults.
- Create the event
On the events list press New event. Give it a name, its timezone, a start and a duration or end time, and press Continue. Then pick the event type closest to what you are running — a town hall, a conference session, a webinar, a training, or Custom. The type sets up access and engagement defaults; you can change every one of them later. Press Create event. ReactLive prepares the four audience surfaces; Go to admin opens the event's console.
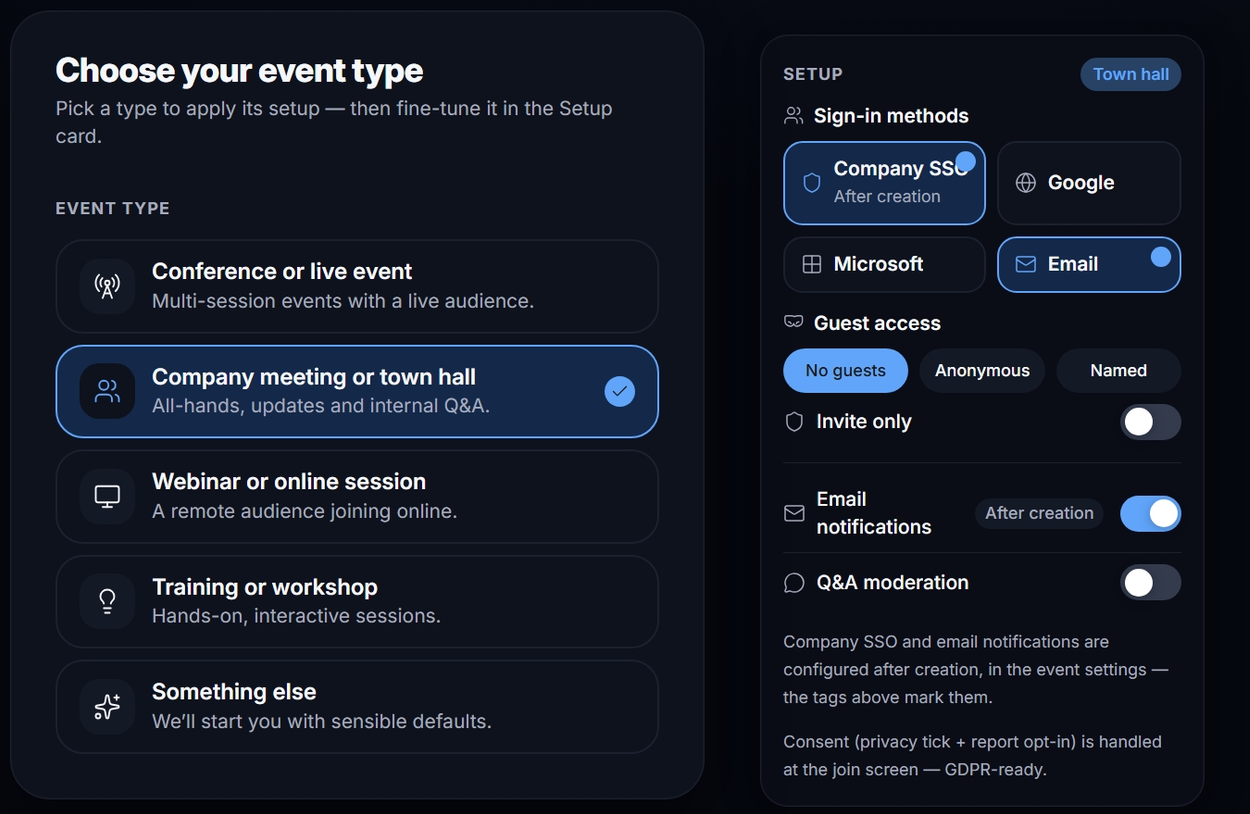
Choosing an event type. The Setup card beside the tiles shows exactly what the type applies. - Give the AI something to read
Open Settings → AI knowledge and drop in the agenda, the speaker bios, the FAQ, last year's deck — anything you would hand a new team member on the day. Files (PDF, Word, Excel, HTML) and web links both work. New sources take a few minutes to become searchable; a Ready pill tells you when. Without sources, the Answer agent can only tell the audience it does not know. AI knowledge →
- Add your team
Settings → Team. Anyone already in your workspace can be added with a click; anyone else by email. Moderators get the whole console for this event. Team →
- Check who can join
Settings → Access shows the event code, the sign-in methods and whether guests are allowed. The generated code is six characters, shown as
7K2 Q4H; change it to something memorable (ignite2027) if you are printing it. The join link isreactlive.com/e/<code>. Access → - Put the join code on a slide
Share on the events list or the console copies the join link and shows the QR. The wall shows the QR too, so a room can join from the screen.
- Open the wall on the big screen
From Event links open Wall on the machine driving the room's display and make it full screen. Leave Main view on Event info until you have something to show — that is the big join QR. The wall →
- Go live
The event goes live at its start time on its own. To start early, Settings → Configuration → Go live now. The Event status card on the console's Overview turns to Live now.
- Run the room
Watch the Overview. Questions arrive in Answer; when the Answer agent has a draft it wants you to approve it appears at the top of that section with a count in the sidebar. Launch a poll from Engage → Polls, put the winning question on the wall with Move to in focus, push a short update to every screen from Engage → Updates. Anything Protect is unsure about waits in Protect. The console →
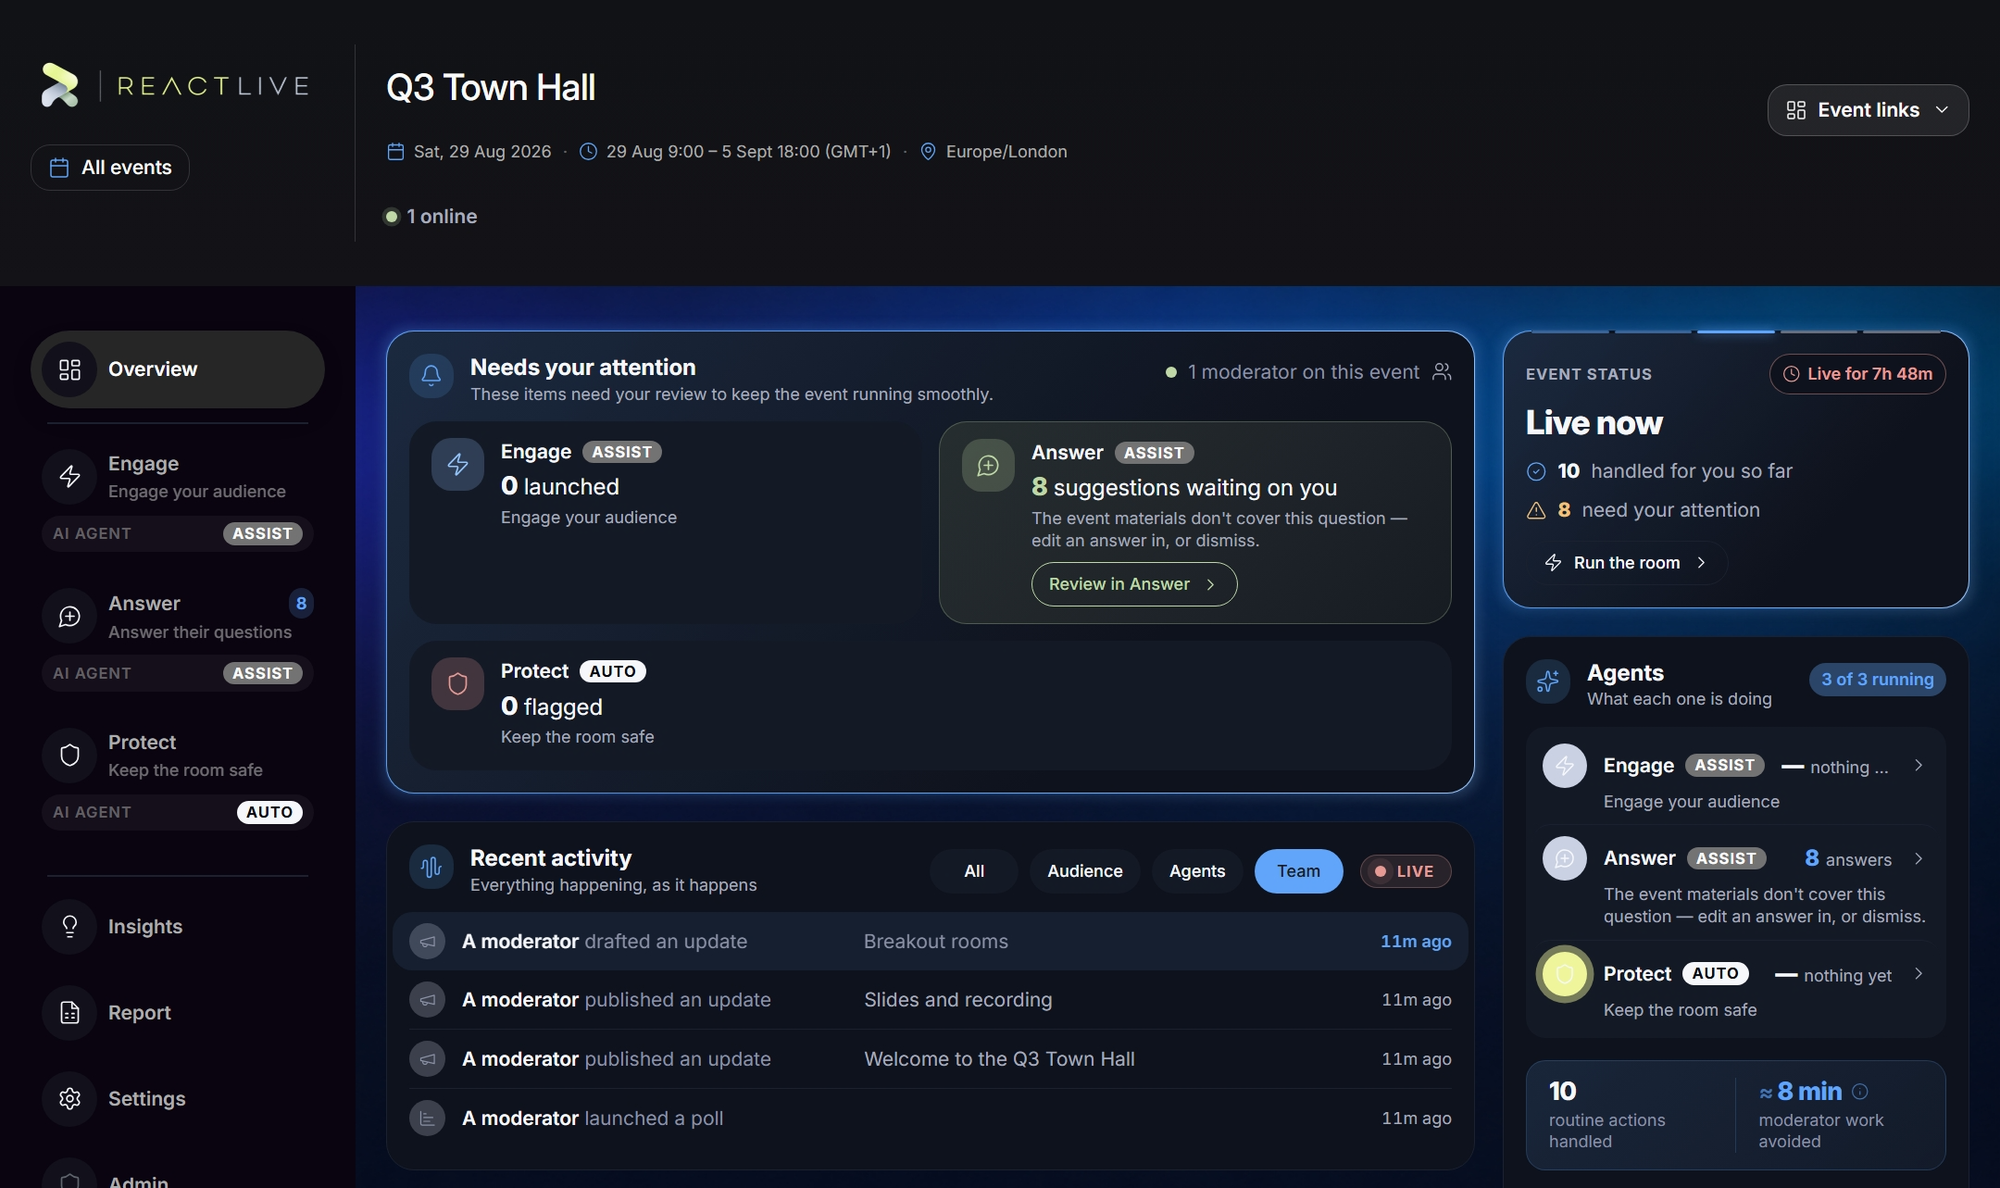
The Overview while live: what needs you, what the agents are doing and the activity feed. - End it and read the report
The event ends at its end time, or press End event in Settings → Configuration. The audience gets the recap and the rating card; you get the final Report — peak online, questions, polls, reactions, the average rating, the AI-written takeaways and the content follow-ups.